Top Shelf Traditional Coleslaw

Top Shelf Traditional Coleslaw

Top Shelf Traditional Coleslaw


Nothing pairs better than BBQ and coleslaw, period.  When I’m invited to any event and I know food is either grilled, smoked or otherwise cooked over fire.  My automatic dish to bring is coleslaw.  You just can’t lose bringing a solid slaw to a cookout or picnic.  Too often, coleslaw is often just the next item in the serving line.  Not anymore.  The recipe below is going to make the Slaw standout AND maintain it’s place so the BBQ can be the star of the show!  To make this a complete Paleo/Primal friendly omit the cream and sweet relish.

Ingredients:

green cabbage:  a medium/large head
carrot:  one
salt:  1 tablespoon kosher or 1 teaspoon of iodized
mayo:  1/4 cup
heavy cream:  1/2 cup – omit for paleo
apple cider vinegar:  2 tablespoons
relish, dill:  1 tablespoon
relish, sweet:  1 tablespoon- omit for paleo
black pepper:  to taste, 1/2 teaspoon or less
raisins:  2-3 tablespoons

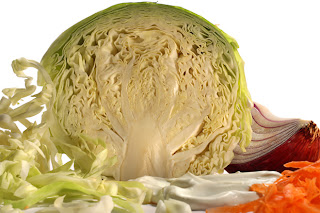
Now for the work, chopping the cabbage.  To start, you have to cut the leaves of the head off of the cabbage core.  So hold the cabbage with the stem facing you and place your knife where the broad leaf stems fade into the cabbage leaves.  Now cut at an angle to the other side of the cabbage head.  You should end up with three or four cabbage wedges.

Time for some knife skills:  Take a wedge and start shaving in quarter inch intervals through the wedge.  When complete, chop the long shaved pieces into quarter inch squares.  This gives the cabbage a nice uniform size which helps the dressing coverage and absorption.  This process is a lot of knife work.  An alternative is to use a food processor to chop the cabbage.  Use one if you want, it’s all good.  Also, peel and grate one carrot.  Combine the carrot with the cabbage.

Time for the critical step.  Place the chopped cabbage/carrot into a colander and mix the salt with the cabbage.  The cabbage needs to steep for 1-4 hours.  Taking the time to include seeping into the recipe will separate your Slaw from coleslaw.

Go ahead and mix the dressing while the cabbage seeps.  In a mixing bowl combine all the remaining ingredients and refrigerate until you are ready to combine the dressing with the cabbage.

Finally, mix it all together-yum!

 
Stolen From HERE!
Beef Short Ribs Braised in Red Wine

Beef Short Ribs Braised in Red Wine


Ingredients:

  • 2-3 pounds grass-fed beef short ribs (on bones)
  • Kosher salt and freshly ground pepper
  • grass-fed beef lard
  • extra-virgin olive oil
  • 2 celery ribs, coarsely chopped
  • 2 medium carrots, coarsely chopped
  • 1/2 large sweet onion, coarsely chopped
  • 6 cloves of garlic, peeled and smashed with the side of a knife
  • 1 bay leaf
  • 2 tablespoons tomato paste
  • 4-5 springs of thyme, tied together with kitchen string
  • 2 cups red wine
  • 2 tablespoons balsamic vinegar
  • 2 cups beef stock
  1. Preheat oven to 325F.
  2. Season the ribs all over with salt and pepper.
  3. Heat 1-2 tablespoons of lard in a large Dutch oven over medium-high heat.  Brown beef on all sides in batches; place browned ribs in a bowl.
  4. Pour off “used” oil.  Add ~1 tablespoon of olive oil to pan and return to medium-high heat.  Add onions, celery, and carrots.  Cook until softened, stirring occasionally.
  5. Add garlic, bay leaf, tomato paste, and thyme  Cook briefly (about 2 minutes), stirring constantly.  The tomato paste should begin to caramelize, sticking to the pan.
  6. Add wine, beef stock, and balsamic vinegar.  Stir well.
  7. Bring to a boil, then return the ribs and any accumulated liquids to the pot.  Cover and place in oven to braise for around 3 hours or until the ribs are very tender (as in falling-apart-tender). Check on them occasionally to ladle off excess fat and make sure the liquid doesn’t get too low.  You want the liquids to reduce, but not completely!
  8. When the ribs are done, carefully transfer the meat to a platter.
  9. Ladle off extra fat.  Remove the bay leaf and the thyme stems tied with kitchen string.  Using an immersion blender, puree the sauce.  (You can strain the sauce if you’d like a fine texture, but it is not necessary.)  Season with salt and pepper, to taste.  Return the rib meat to the sauce, reheat on the stovetop, and it’s ready to serve!

Stolen From HERE!


Island Stuffed Chicken

Island Stuffed Chicken


Island Stuffed Chicken

      
Ingredients:
2 Chicken Breasts
1/2 cup Dried Unsweetened Coconut Flakes
1/3 cup Chopped Fresh Cilantro
1/2 teaspoon Pureed Lemongrass (sold by the fresh herbs at your grocery store)
1/2 teaspoon Minced Garlic
1 Tablespoon Coconut Oil
 
plus
 
1 egg
~1/2 cup Dried Unsweetened Coconut Flakes OR Coconut Flour
~1/2 cup Coconut Oil
Toothpicks
 
Melt 1 Tablespoon coconut oil in a small sauce pan on the stove. Add 1/2 cup coconut flakes, cilantro, lemongrass and garlic. Cook over high heat for about 5 minutes, stirring constantly, until the coconut begins to brown. When the coconut is golden, remove from heat and put mixture in a small bowl.
 
Cut the chicken breasts in half to make 2 wide, thin, pieces per breast. Think “hamburger style” vs. “hot dog style.” Pat dry. Spread about 1/4 of the coconut herb mixture over each breast, and roll up the breast tightly with the mixture inside. Use 2-4 toothpicks per breast to secure the roll.
 
Beat the egg in a small bowl. Dip the stuffed chicken in the egg. Use your clean fingers to smear the egg over the whole piece of chicken. Then cover each chicken piece with the additional coconut flakes or the coconut flour. My husband doesn’t like using the flakes for breading, but he really likes it with coconut flour. I love both, so you can decide which you prefer.
 
Preheat the oven to 375.
 
Melt about 1/2 cup coconut oil in a pan over medium high heat. Place the coconut breaded and stuffed chicken pieces in the oil and cook until golden on each side. Then, place in a pan and cook in the oven for 20 minutes. Remove the toothpicks before serving.
 
I like to place the chicken on a thin bed of coconut (the extras from breading) when I bake it in order to soak up the extra oil. 
 
The chicken is shown pictured with chopped carrots, asparagus, and red peppers which I sauteed in the leftover oil from cooking the chicken. Make sure you scoop out any coconut pieces that fell off and burned before you add the vegetables
 
Stolen From HERE!